Building a Real-World Aviation Training Exhibit (And Overcoming a Lot of Challenges Along the Way)

I finally wrapped this project with JNP Aviation, and it’s easily one of the most complex, challenging, and genuinely rewarding projects I’ve worked on.
The goal was to help them build a training exhibit for students learning to become ground crew at airports. Instead of just teaching concepts, they wanted something immersive. Something that actually simulates what it’s like to be out there on the tarmac.
On paper, it sounded pretty straightforward. In reality, this turned into a long chain of creative and technical problem-solving that we had to figure out step by step.
This write-up is a behind-the-scenes breakdown of that process. It reads more like a working diary than a polished case study, because that’s honestly what it was. I wanted to document it this way because the interesting part of this project wasn’t just the final result, it was everything it took to figure it out along the way. With one-of-a-kind projects like this, your entire arsenal of skills, knowledge, experience, and most importantly—your ability to trust that you can figure out solutions, is all put to the test.
The Objective
The core deliverable was to create ~8 training scenarios that simulate real-world situations.
These included components like:
Headset aircraft checks
Ground-to-crew communication
Engine and propeller start/stop
Aircraft arrival
Emergency situations like smoke and fire
On top of that, each scenario also needed a hand signal version for when headset communication fails.
So right away, we knew this wasn’t just filming a few clips. This was building a full system of scenarios that had to feel real.
The Aircraft and the Initial Plan
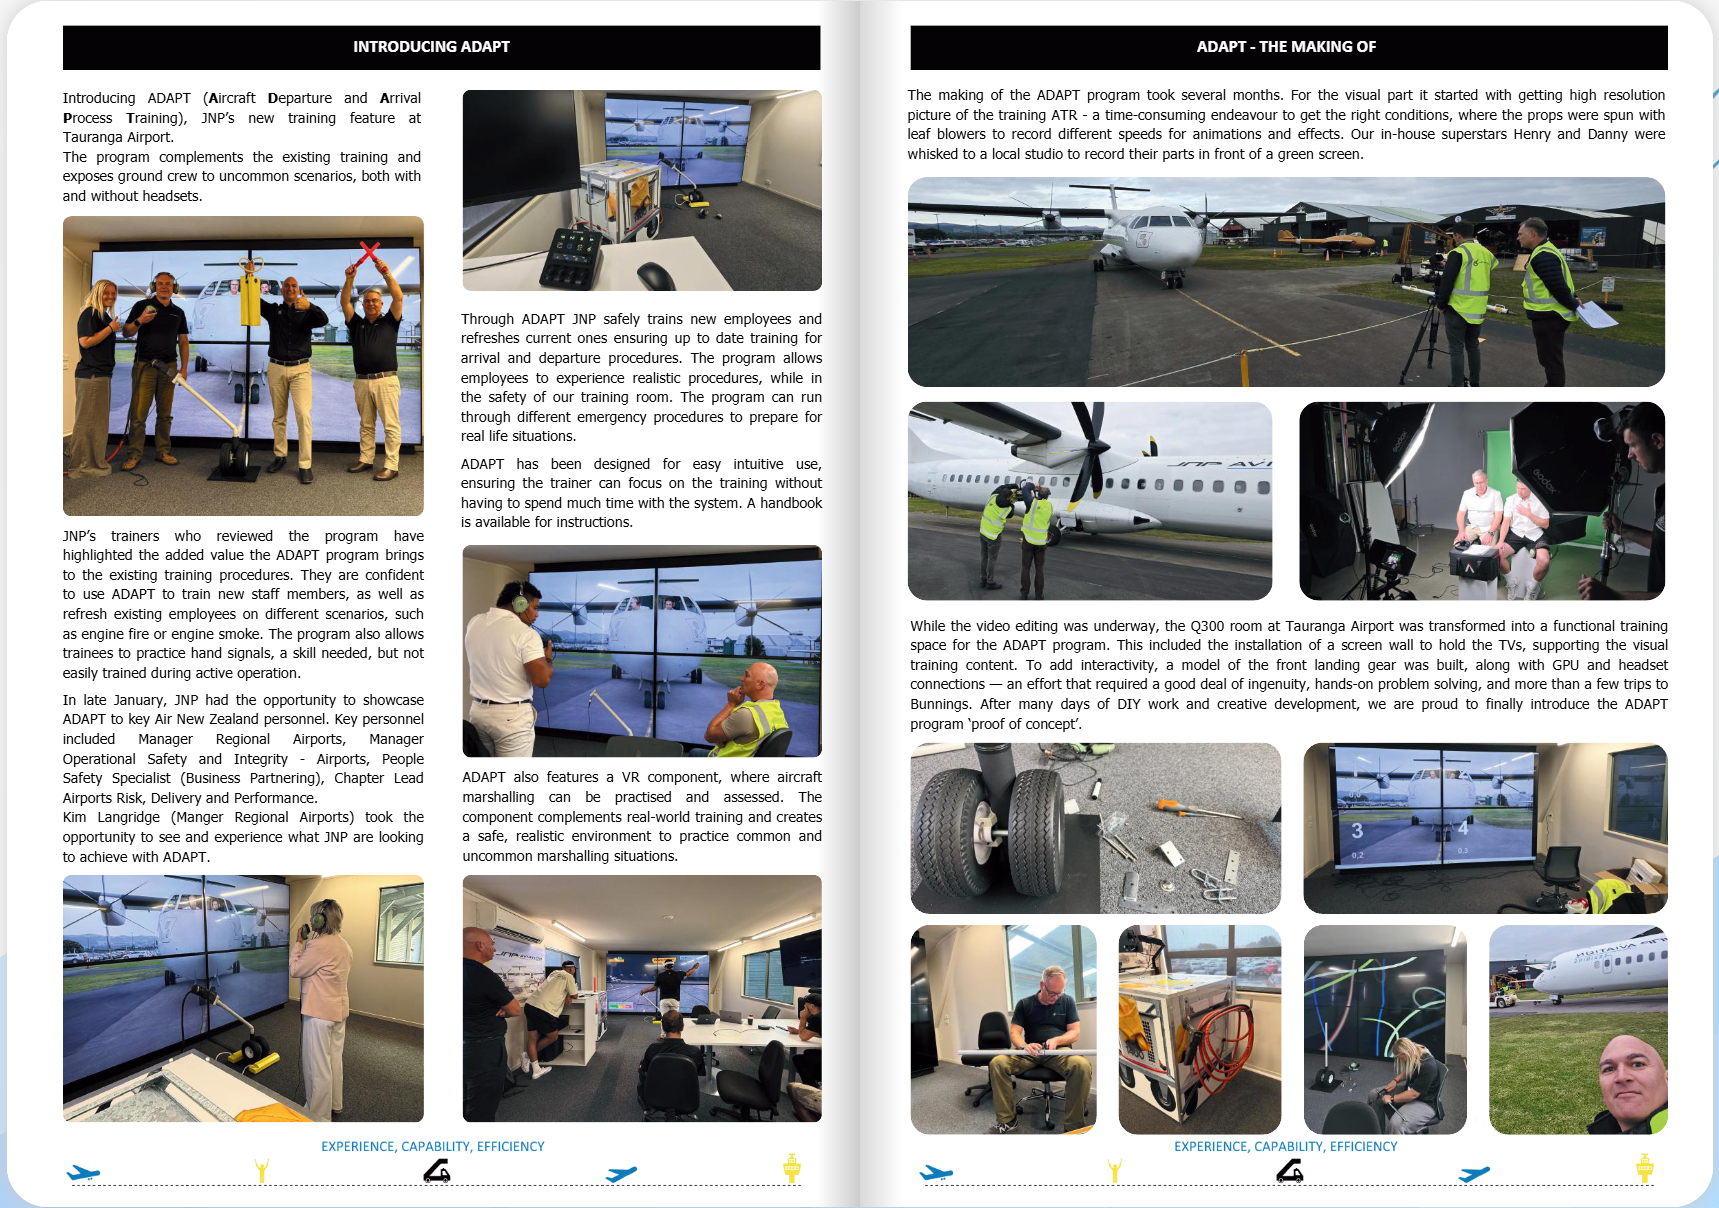
JNP Aviation had procured a decommissioned ATR aircraft that we used for the entire project.
From the outside, it looks completely normal. But in reality, it’s basically just a shell. The engines and propellers don’t function at all, which became a major factor in how we approached everything.
The original plan was actually pretty simple:
Shoot a high-resolution photo of the aircraft straight on
Print it massive as a wall backdrop
Mount two large TVs over the cockpit and propeller areas (the cockpit and the propeller areas were the actual real estate where the training content takes place)
Those TVs would handle all the motion, while the printed image handled the rest.
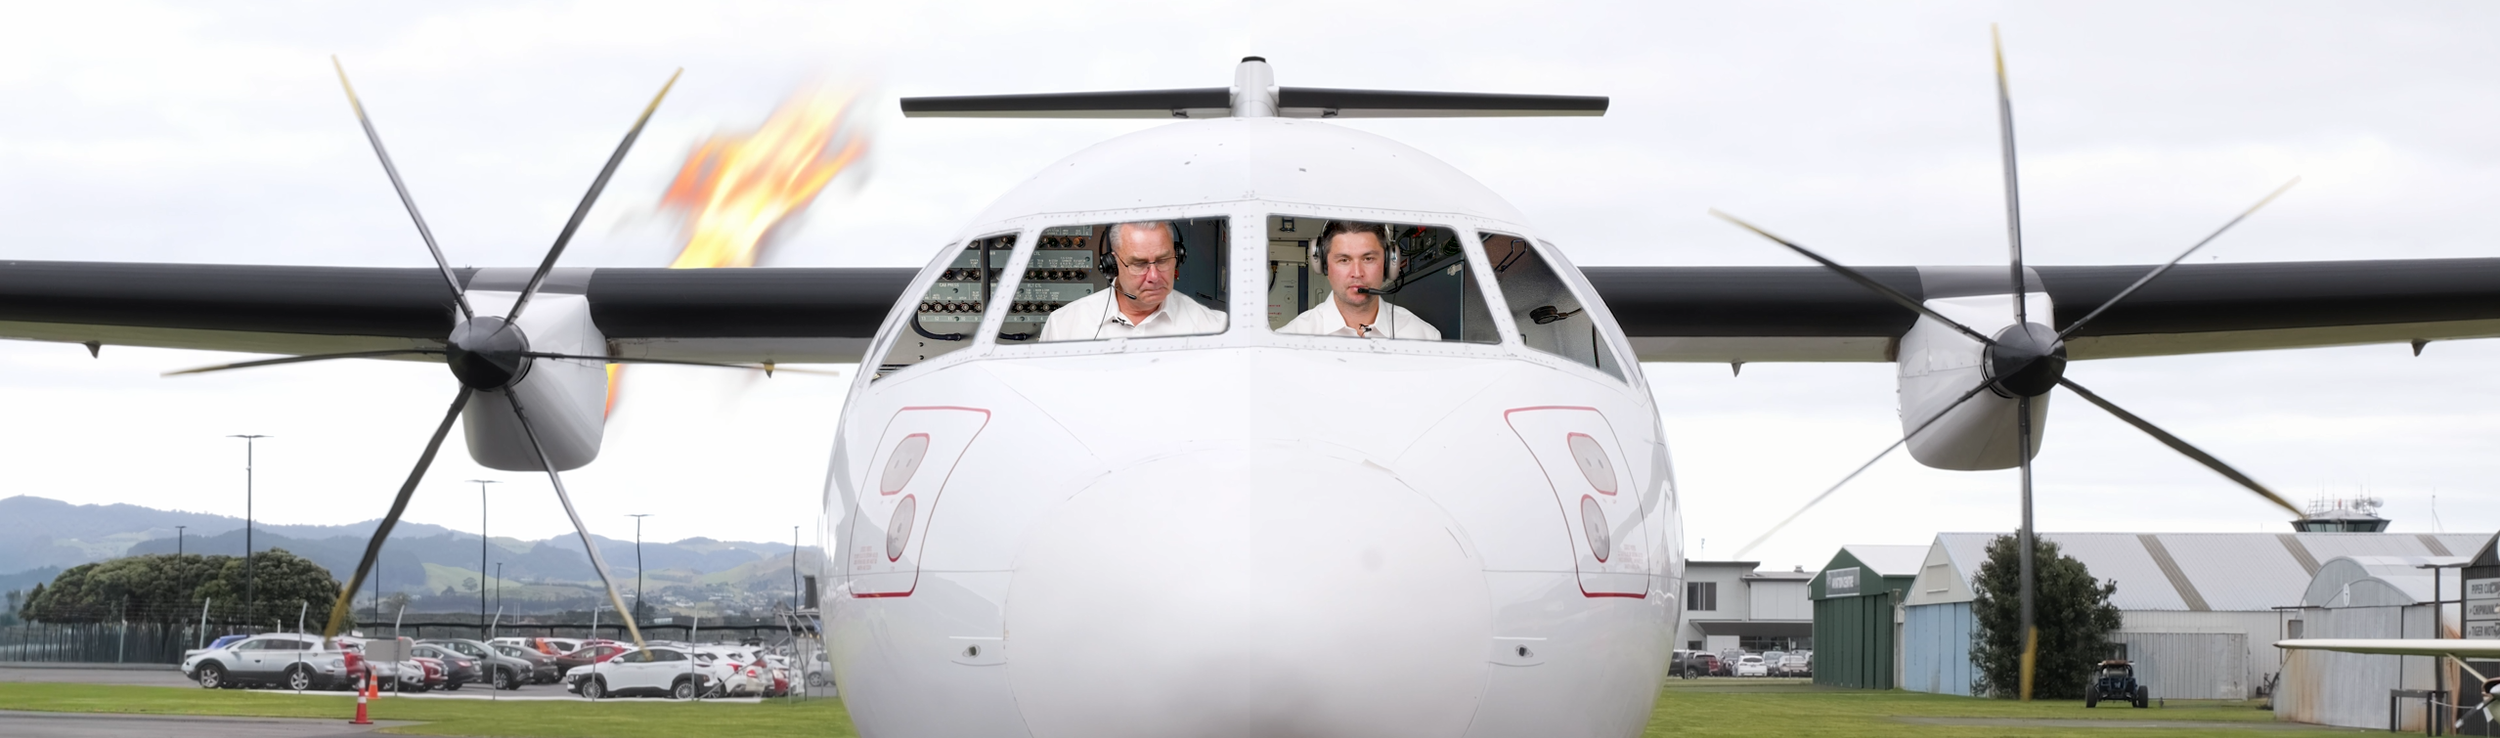
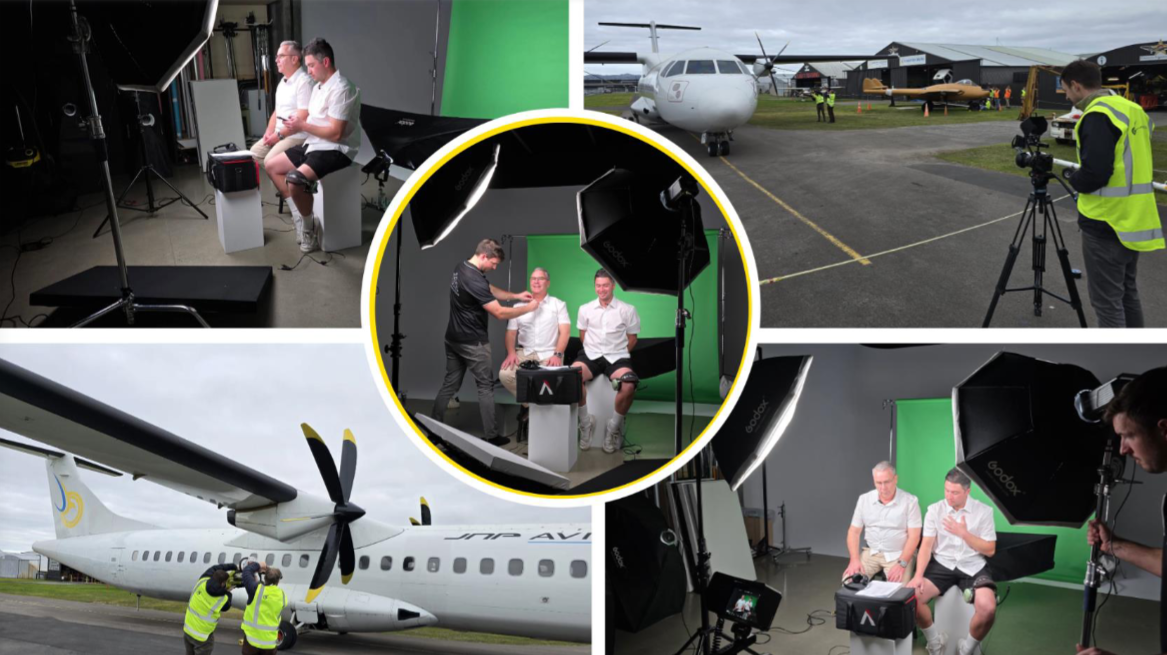
Filming on the Tarmac (and Thinking Ahead)
We worked with JNP Aviation to map out all the scenarios, then went out to the tarmac to capture everything.
We started by shooting the high-res photo of the aircraft from the exact perspective a ground crew member would stand. That detail mattered for realism.
From there, we moved into filming all the components for the scenarios. This is where things started to get a bit more thoughtful on our end.
We knew the final content was going on large 4K TVs, so resolution was a big deal. If we just filmed everything straight on and later cropped that down into what would be just the left and right TV sections, we were going to lose a massive amount of resolution.
So we started thinking… alright, how do we protect against that?
What we landed on was:
Film everything straight on in 6K
Then physically shift the camera to the right and capture that side (the right prop and right cockpit)
Then shift back to the left and capture that side (the left prop and left cockpit)
But even while doing that, there was a bit of hesitation. If the base of the exhibit was going to be a straight-on photo, and we ended up needing to composite footage that was slightly off to the left or right… would the perspective look wrong? At that point, we didn’t know.
So instead of committing to one approach, we covered both. We filmed everything from the offset positions and again straight on from the exact same spot as the photo.
At the time, it felt like extra work. That decision ended up saving us later.
The Propeller Problem
We knew the scenarios needed to include a full range of propeller behavior:
Stationary
Starting up and building to speed
Full speed
Slowing down
Coming to a stop
And on top of that, the left and right propellers don’t behave identically in real life, so we needed to simulate that accurately too. (The port and starboard propellers are noticeably different with behavior, particularly around starting, building up speed, slowing down, and stopping.
We got out there and actually tried to move the props. They barely moved.
That was one of those moments where you just kind of pause and go… alright, this is going to be more complicated than expected.
Manually turning them was not only slow, but not viable because of their size. So we got creative and had two crew members use leaf blowers on either end to try and get some movement.
Even then, it was extremely slow. But we managed to capture about one full revolution of each prop.
At the time, it didn’t feel like much. It ended up being enough to build everything from.
Capturing Real Audio
For audio, we went out to Tauranga Airport with JNP Aviation and recorded directly on the live tarmac.
We captured:
General tarmac ambience
Aircraft startup and shutdown
Takeoffs and landings of the exact aircraft model
This was actually a really interesting learning experience. The audio gain and dynamics in those situations are massive. Completely different from something like interview dialogue.
A lot of it was intelligently experimenting in the moment and figuring out how to capture something usable in that environment.
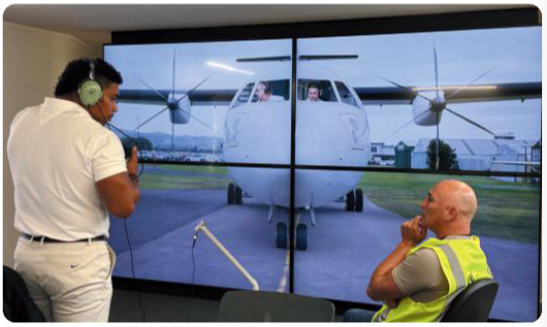
Green Screen Production
Next, we moved into the studio and set up a full green screen environment with proper lighting.
We brought in two pilots and filmed:
Headset communication scenarios
Hand signal scenarios
We also captured their headset audio during this process so everything would integrate properly later.
A Major Pivot
After we delivered the high-res image, JNP came back with an update.
They weren’t able to get the image printed and mounted in a way that would work structurally in the exhibit.
So the plan changed completely.
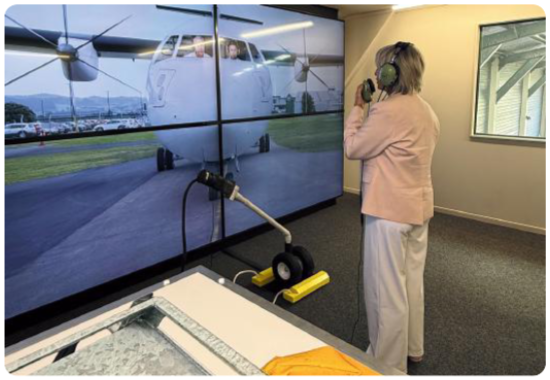
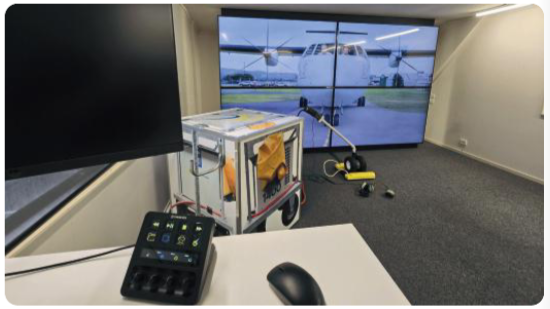
Instead of a printed wall with two TVs, the entire exhibit shifted to a 2x2 grid of four 80-inch 4K TVs.
So the high-res photo was basically scrapped.
This was one of those moments where it’s like… okay, everything we planned just shifted, now we need to adapt.
Why That Earlier Decision Paid Off
Because we had filmed everything both:
Straight on
And slightly left/right
We had options.
Originally, the offset footage was meant to maximize quality for two screens. But now, with a full digital setup, the straight-on footage became critical.
That “just in case” decision ended up being a huge win.
Resolution Challenges
Now we were essentially taking 6K footage and:
Dividing it across a 2x2 grid of 4K TV’s
PLus cropping further within that
Which obviously kills resolution.
So we leaned heavily on advanced upscaling tools to bring everything back up so each of the four displays still looked like true 4K.
Figuring Out the Propeller Animation
This was one of the biggest problem-solving phases in the entire project.
We knew from the start we were going to have to animate the props. The question was how.
Initial thought was pretty straightforward:
Bring a frame into After Effects or Photoshop, isolate the propeller, and just rotate it.
That didn’t work.
Because of the perspective (which was chosen specifically to simulate where a ground crew would actually be standing on the tarmac). We weren’t actually looking perfectly straight at the props, so any artificial rotation looked wrong immediately. Looking straight at the nose of the aircraft from that distance actually results in either propeller looking outward rather than at the camera.
So then it became a bit of a process of trial and error.
What we did have was one full revolution of each prop from filming.
So we leaned into that:
Isolated that one clean revolution
Found the exact cut points
Built looped sequences from it
Each revolution took about 20 seconds originally, so we started experimenting with speeding it up. A lot.
We tested:
Different speed percentages
Frame blending vs optical flow
How much motion blur felt realistic vs fake
There wasn’t a single “this is the way” moment. It was a lot of trying something, watching it, adjusting, trying again.
Then we had to figure out startup and shutdown.
We went and studied real footage of the same aircraft and matched the timing as closely as possible, especially since the left and right props behave differently.
Eventually, we got it dialed.
Building the Scenarios
From there, we started building out the full compositions.
Each scenario became a combination of:
Base aircraft footage
Green screen pilot footage
Propeller animations for starboard and port engines (nested sequences)
Propeller effects for scenarios (smoke, fire, etc…)
Lighting elements like the tail light
Real tarmac audio and SFX
At this point, things started getting complicated fast.
There was a lot of finesse involved in keeping everything in sync. The pilot visuals, the headset chatter, the prop speeds, the environmental audio… everything had to line up.
And the more we tweaked things, the more fragile it all became.
Small changes could ripple through multiple layers. At times it genuinely felt like performing brain surgery.
Smoke and Fire (Probably the Hardest Part)
Some scenarios required smoke and fire coming from the engines.
Which sounds fine… until you realize it needs to appear from behind the engine, not in front.
Our first thought was rotoscoping the props to create separation.
Didn’t work.
The props were too thin from that perspective, and After Effects just couldn’t handle it cleanly.
So we started experimenting. A lot.
Different masking approaches, duplicating layers, playing with blending modes like add, subtract, multiply… basically learning how layers interact when stacked.
Eventually, we landed on a solution:
Mask and isolate parts of the wing and prop center
Duplicate layers and bring them forward
Use opacity, feathering, and blending to fake depth
It wasn’t a clean “textbook” solution, but it worked. And it looked believable.
Then we had to build the inverse too. Fire and smoke appearing as the engine shuts down. This effect and solution needed to be customized both for stationary/slow moving props and completely separately for full speed as the illusion’s design is quite different to pull off for stationary/slow moving vs fast/full speed.
We also brought in professional asset libraries to get realistic smoke and fire elements, and paired that with a harsh engine cut sound for added impact.
The Small Details That Break Everything
One thing we didn’t fully anticipate was how much small background details would stand out once we sped everything up.
When you take a loop and run it at 500–1000% speed, everything in that frame becomes noticeable.
At one point, there was a guy in the background chopping wood. At full speed, it looked COMPLETELY ridiculous.
So we had to:
Extract a high-res frame
Remove him
Composite that cleaned section back into the video
Same thing with the crew using leaf blowers. They were standing right up against the aircraft, so they had to be removed as well.
We also added fume effects for engine startup and shutdown, again using a mix of techniques to make it feel like it was actually happening behind the engine.
Performance and Workflow Lessons
At a certain point, the project started to struggle just to run.
We had:
Long looping prop sequences
Nested inside multiple other sequences
All running at extreme speeds
It was a lot. Playback became borderline unusable at times. So we had to start simplifying.
One example was taking those long prop loops, exporting them as their own files, and then bringing them back in as flattened assets.
It sounds simple, but it was necessary just to keep the project functional.
This project really drove home how important things like file organization, naming, and overall structure are. When you’re dealing with this many files, versions, and nested sequences, it’s not just nice to have, it’s critical.
Final Audio and Playback
Once everything was dialed visually, we moved into the final audio setup.
The goal was a full immersive experience:
The trainee wears a headset and hears pilot communication
The room itself delivers engine noise, tarmac ambience, and SFX
So we built everything out in a 5.1 surround sound setup and learned how to properly configure that workflow.
We also tested different playback approaches:
Separate files for each screen
One massive file spanning all four screens
The single-file approach ended up being the most reliable and easiest to manage.
Final Thoughts
This project was hard. No way around it.
There were a lot of moments where we didn’t have a clear answer and had to figure things out through trial and error.
At the same time, I learned a TON. Not just in terms of technical skills like compositing, animation, and audio, but also in bigger areas like workflow, organization, and performance.
Seeing the final exhibit in action was a completely different kind of experience compared to most of the work I do, which usually lives online. This was something physical, something people interact with in person as part of their training.
I wanted to share this blog post and diary because I am stoked with how this project turned out, and thought it would be interesting for people to see what goes on in the creative’s head throughout something like this. I approached this project from the onset knowing that although daunting, I had the confidence creatively, technically, and professionally to pull it off, including identifying countless obstacles and challenges ahead of time, and navigating plenty of new ones as the project progressed. It really shows that when you are hiring a creative for your project, it’s one thing to be able to say “Look… I’ve filmed a thousand real estate videos just like this next house… trust me, I got this”, but it’s completely next level to be able to approach a one-of-a-kind creative project with a client in such way that provides a them with confidence and trust that you can handle it. Our client was stoked at every stage of this project!
Would I take on something like this again?…..100%.
Check Out JNP’s Press Releases About This Project!